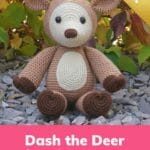
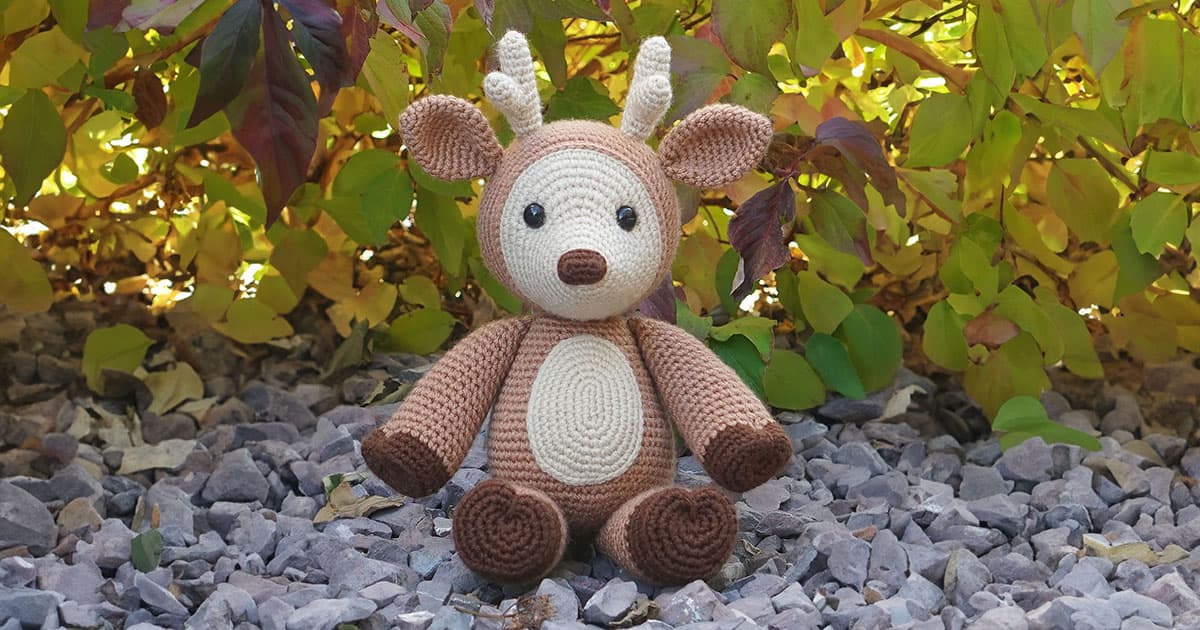
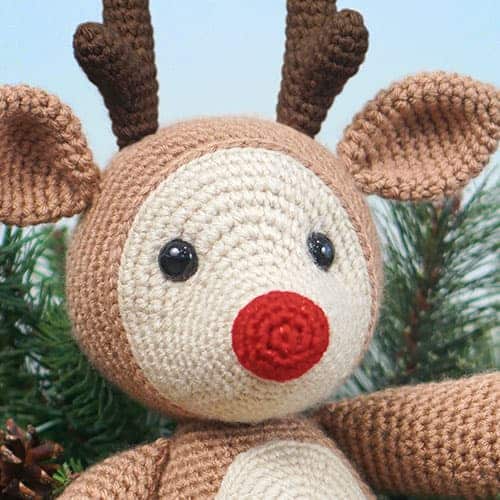
This free deer amigurumi pattern is the final addition to my set of six woodland animal patterns! This sweet little deer might be my favorite pattern I’ve made to date. He’s the perfect project for fall.
I grew up in Southern Nevada, where we didn’t have seasons. It was either blazing hot and ugly, or mildly cold and ugly. 😂 I’ve lived in Utah since 2014, and I’m still not used to having 4 distinct seasons.
My husband laughs at me every time I marvel over the blooming tulips in the spring or the first snow fall of winter. It’s also great that I no longer burn myself when I put on my seat belt in the summer months.
But what really takes the (pumpkin-spiced) cake is the swath of colors when the leaves change in the fall. I love driving through the canyon and witnessing the bright reds, oranges and yellows. It takes my breath away.
A fun fact about this free deer amigurumi pattern: it can easily transform into Rudolph the Red-Nosed Reindeer! Simply make the antlers dark brown, and follow the alternate instructions for the nose.
Another note: some of you will probably find parts of this pattern tricky. I’ve put together a few video tutorials to help! You can find them in the Notes section of the pattern.
Make sure you’re subscribed to my Jess Huff YouTube Channel so you’ll receive a notification when the videos are available.
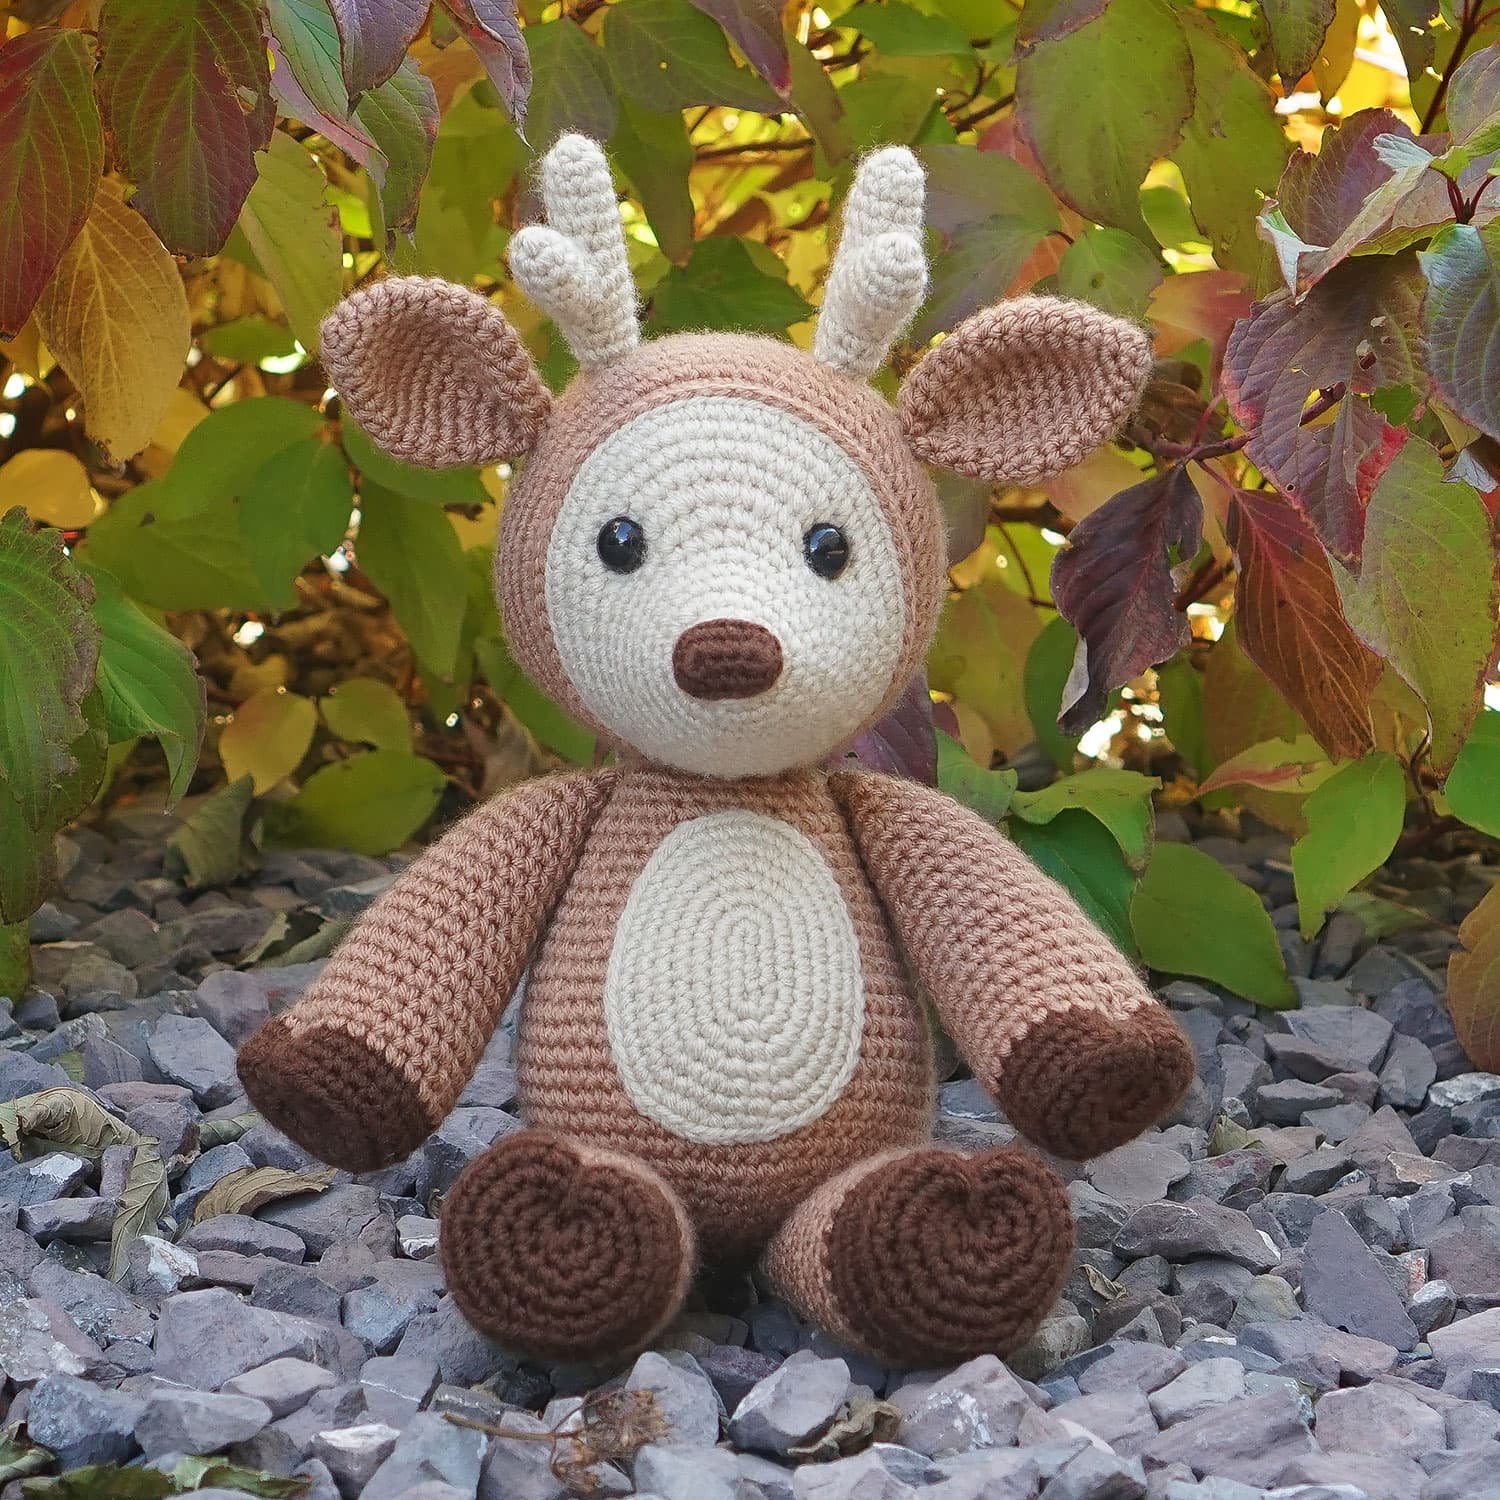
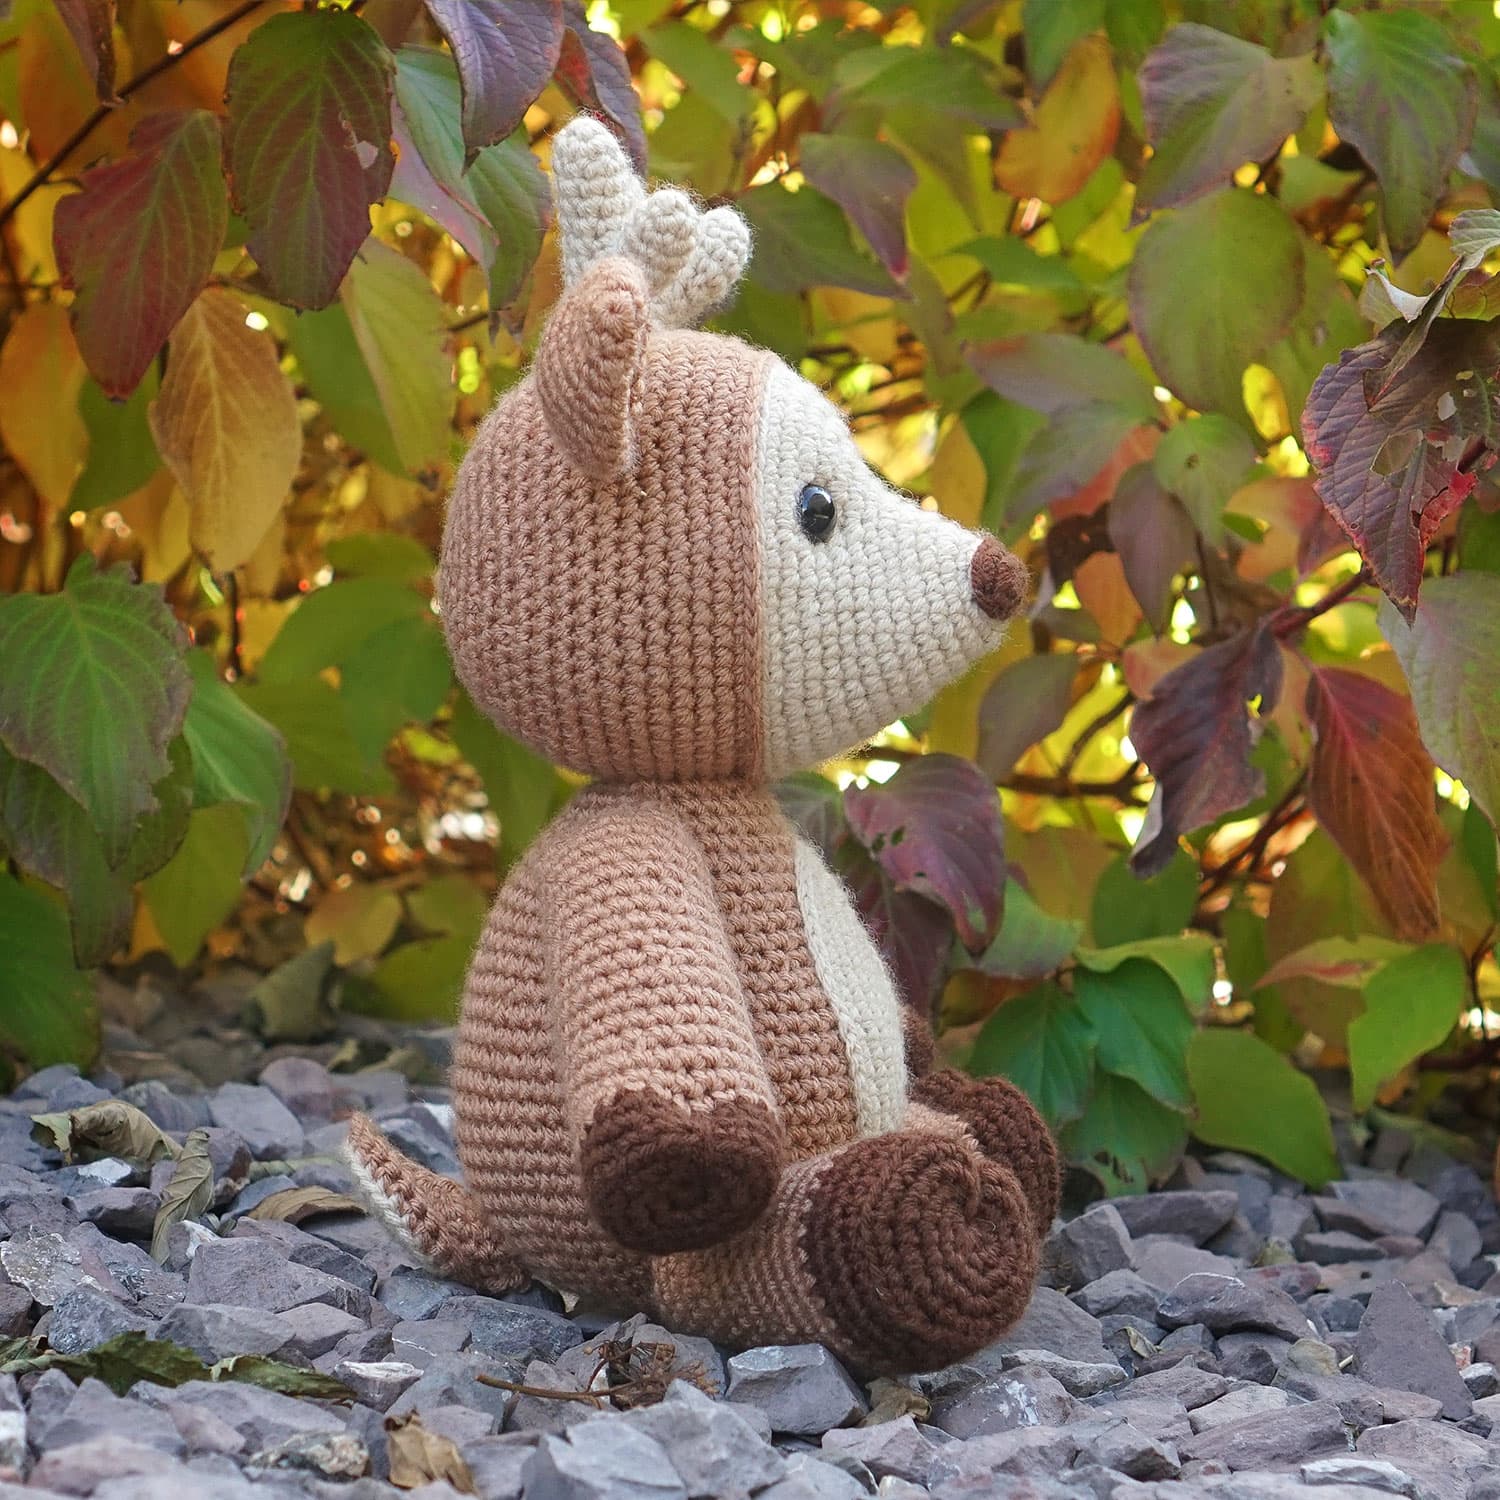
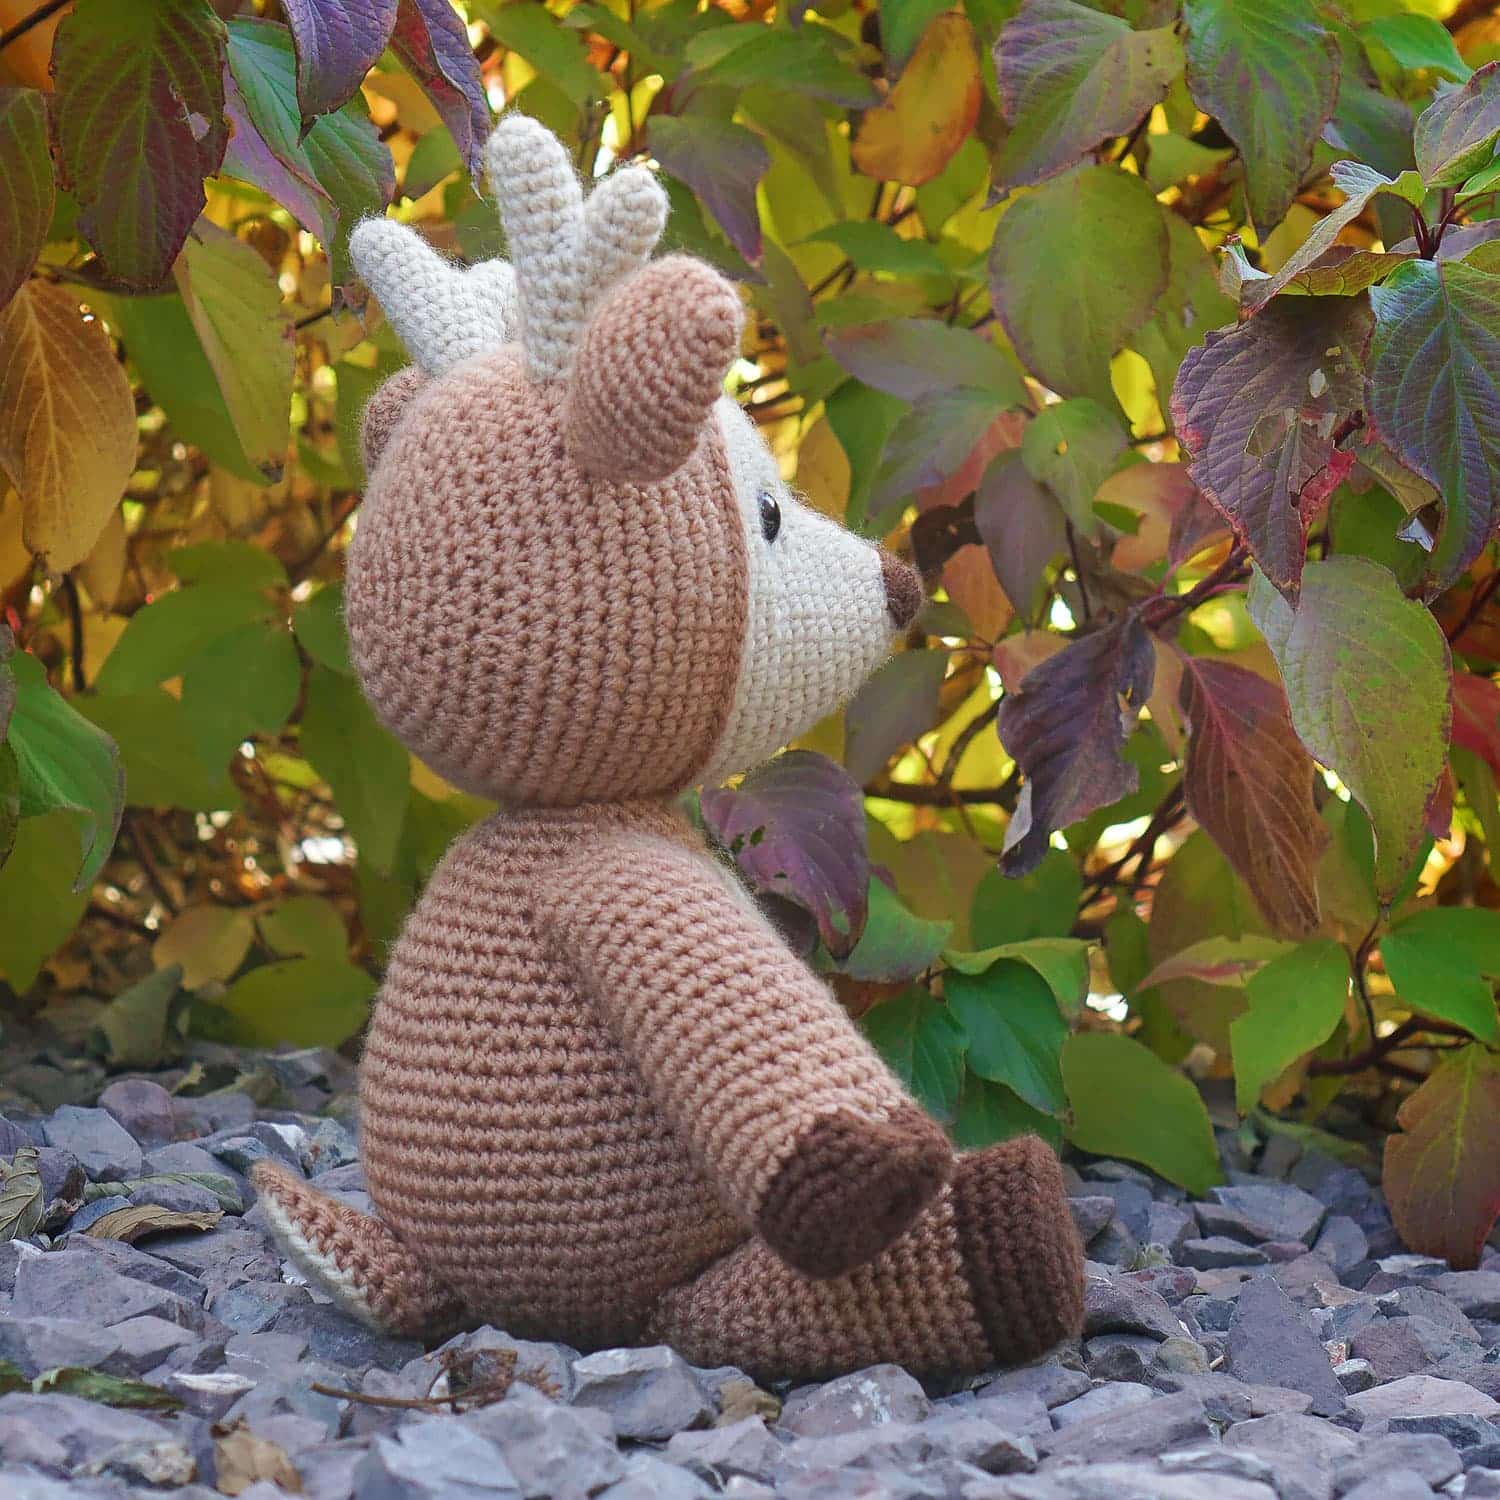
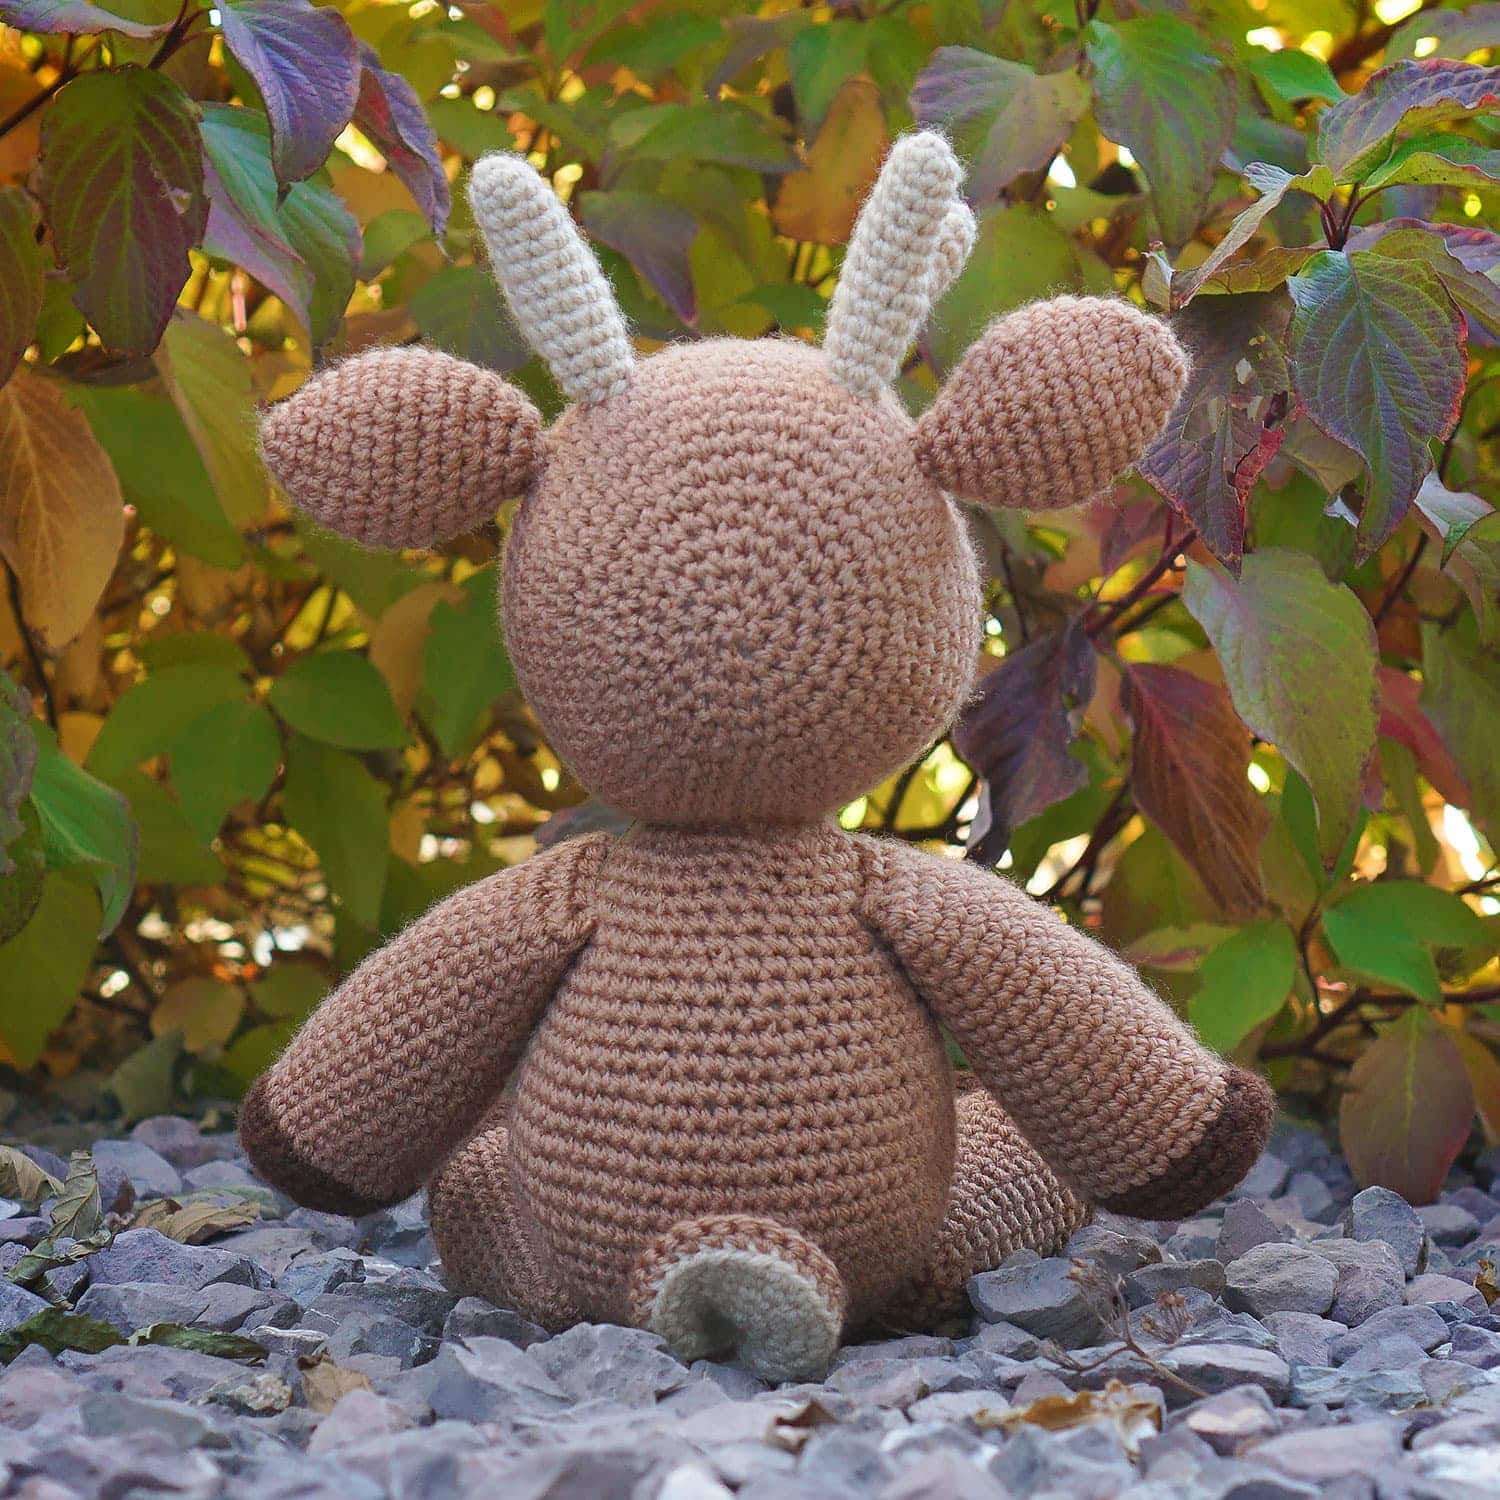
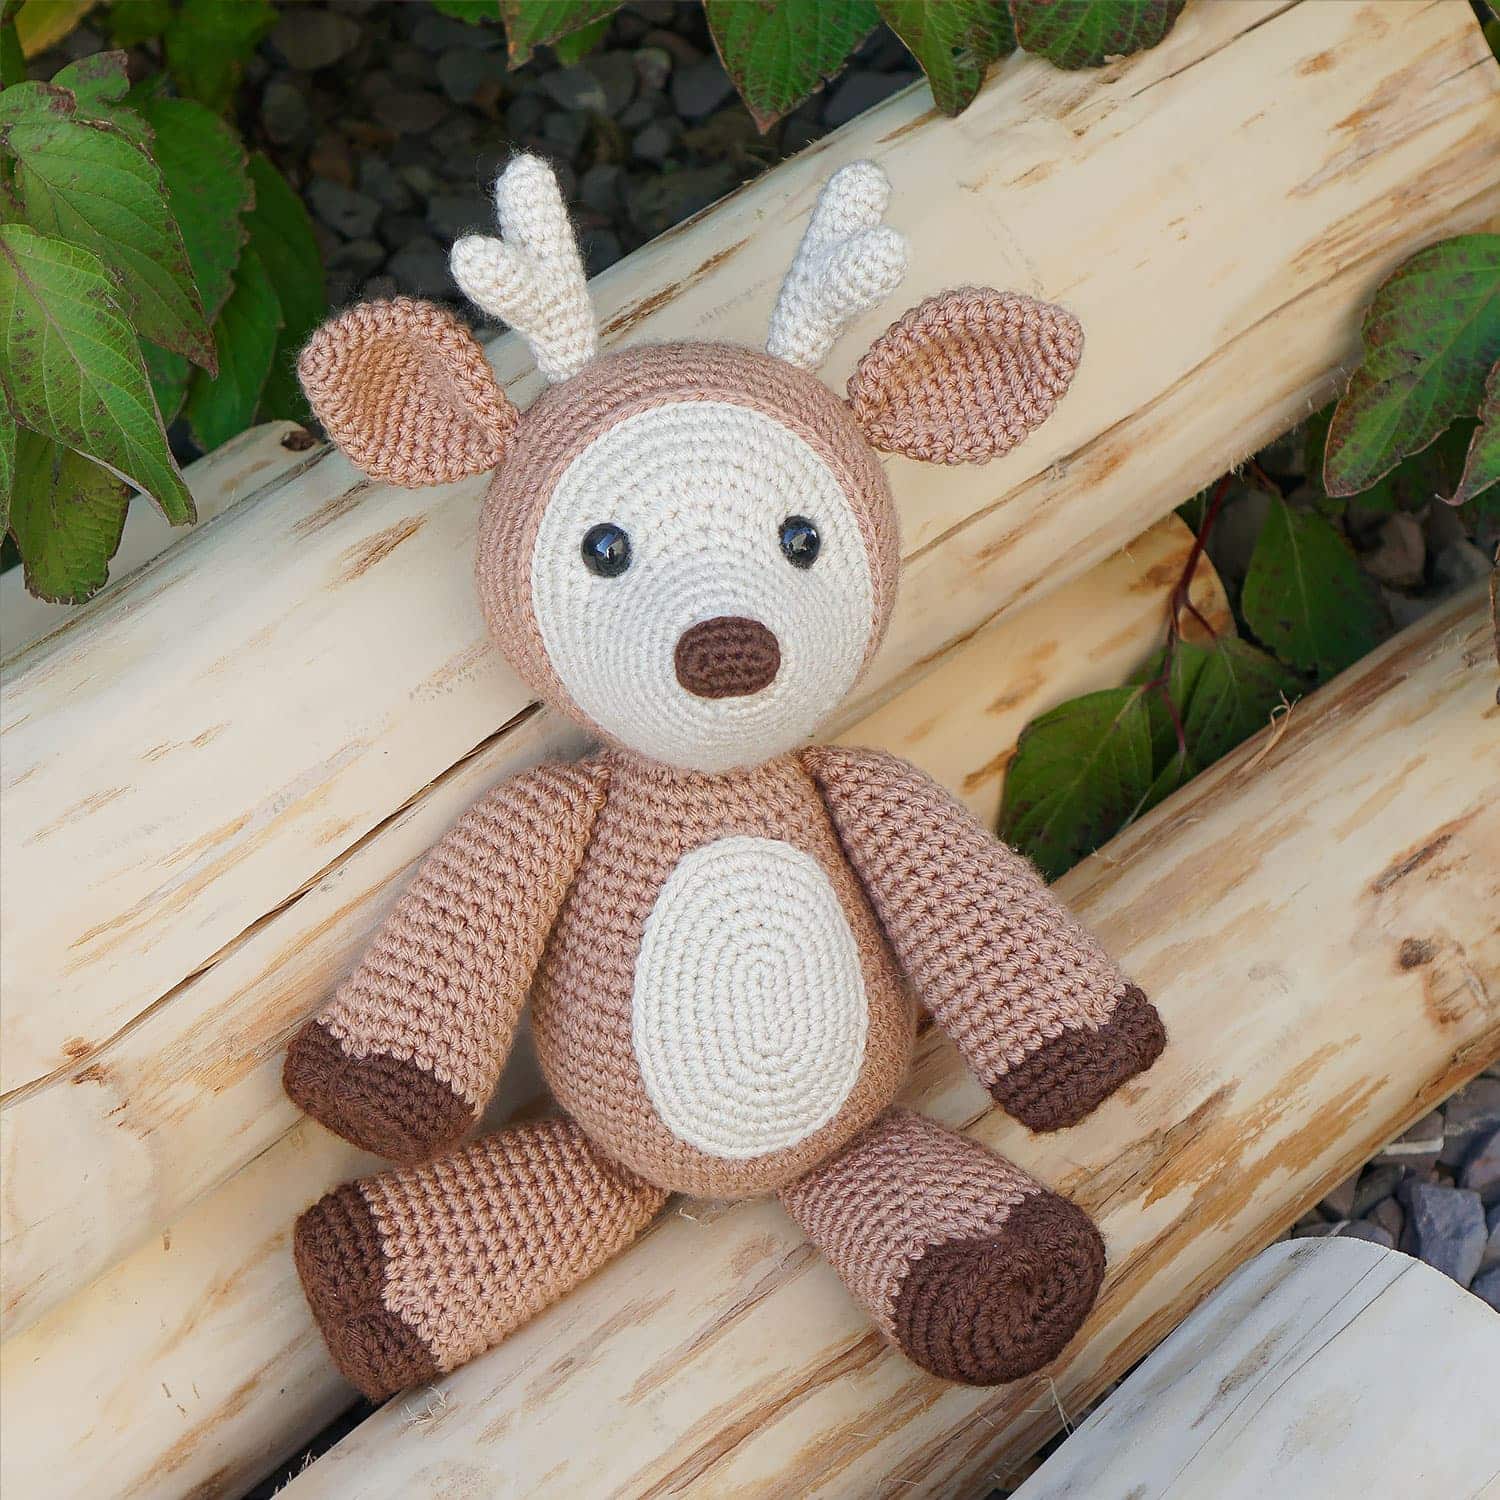
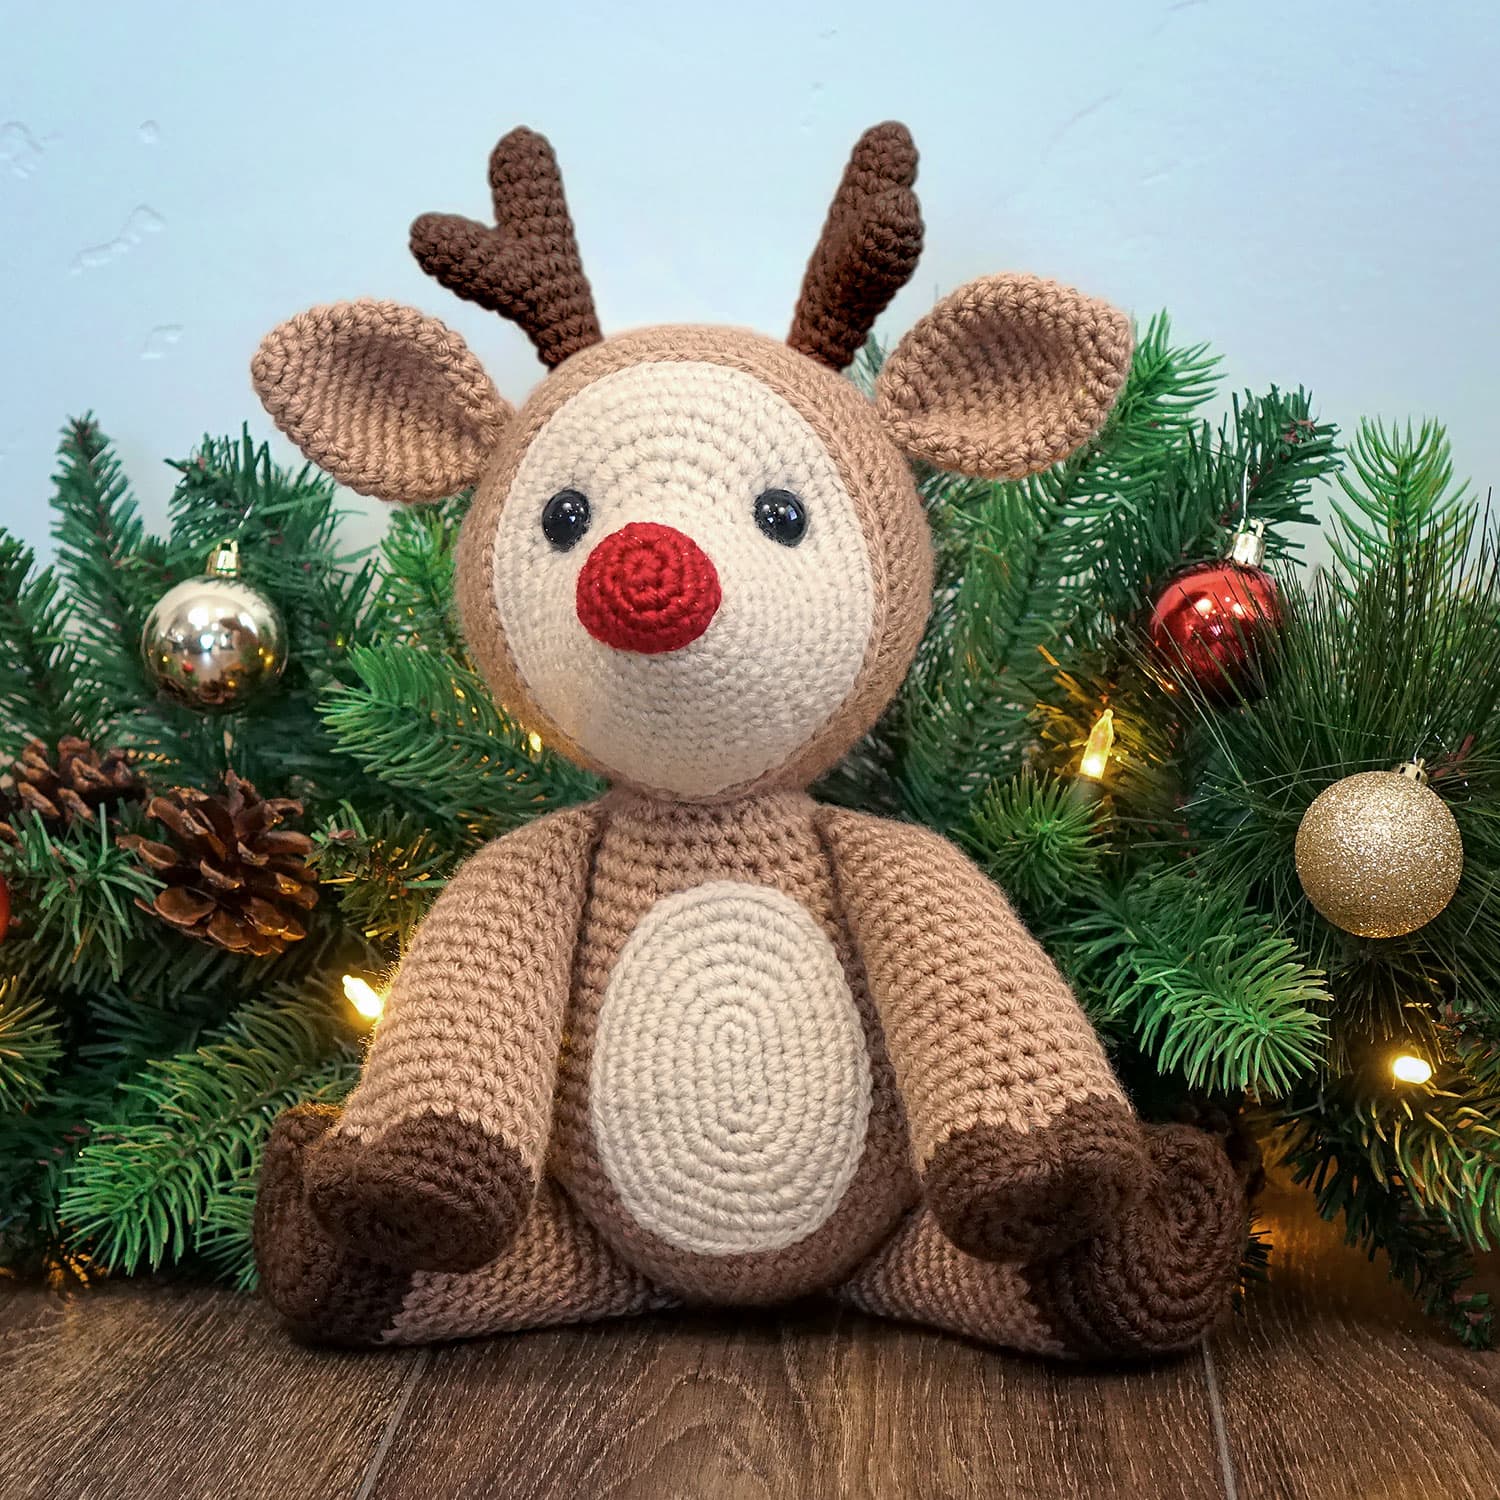
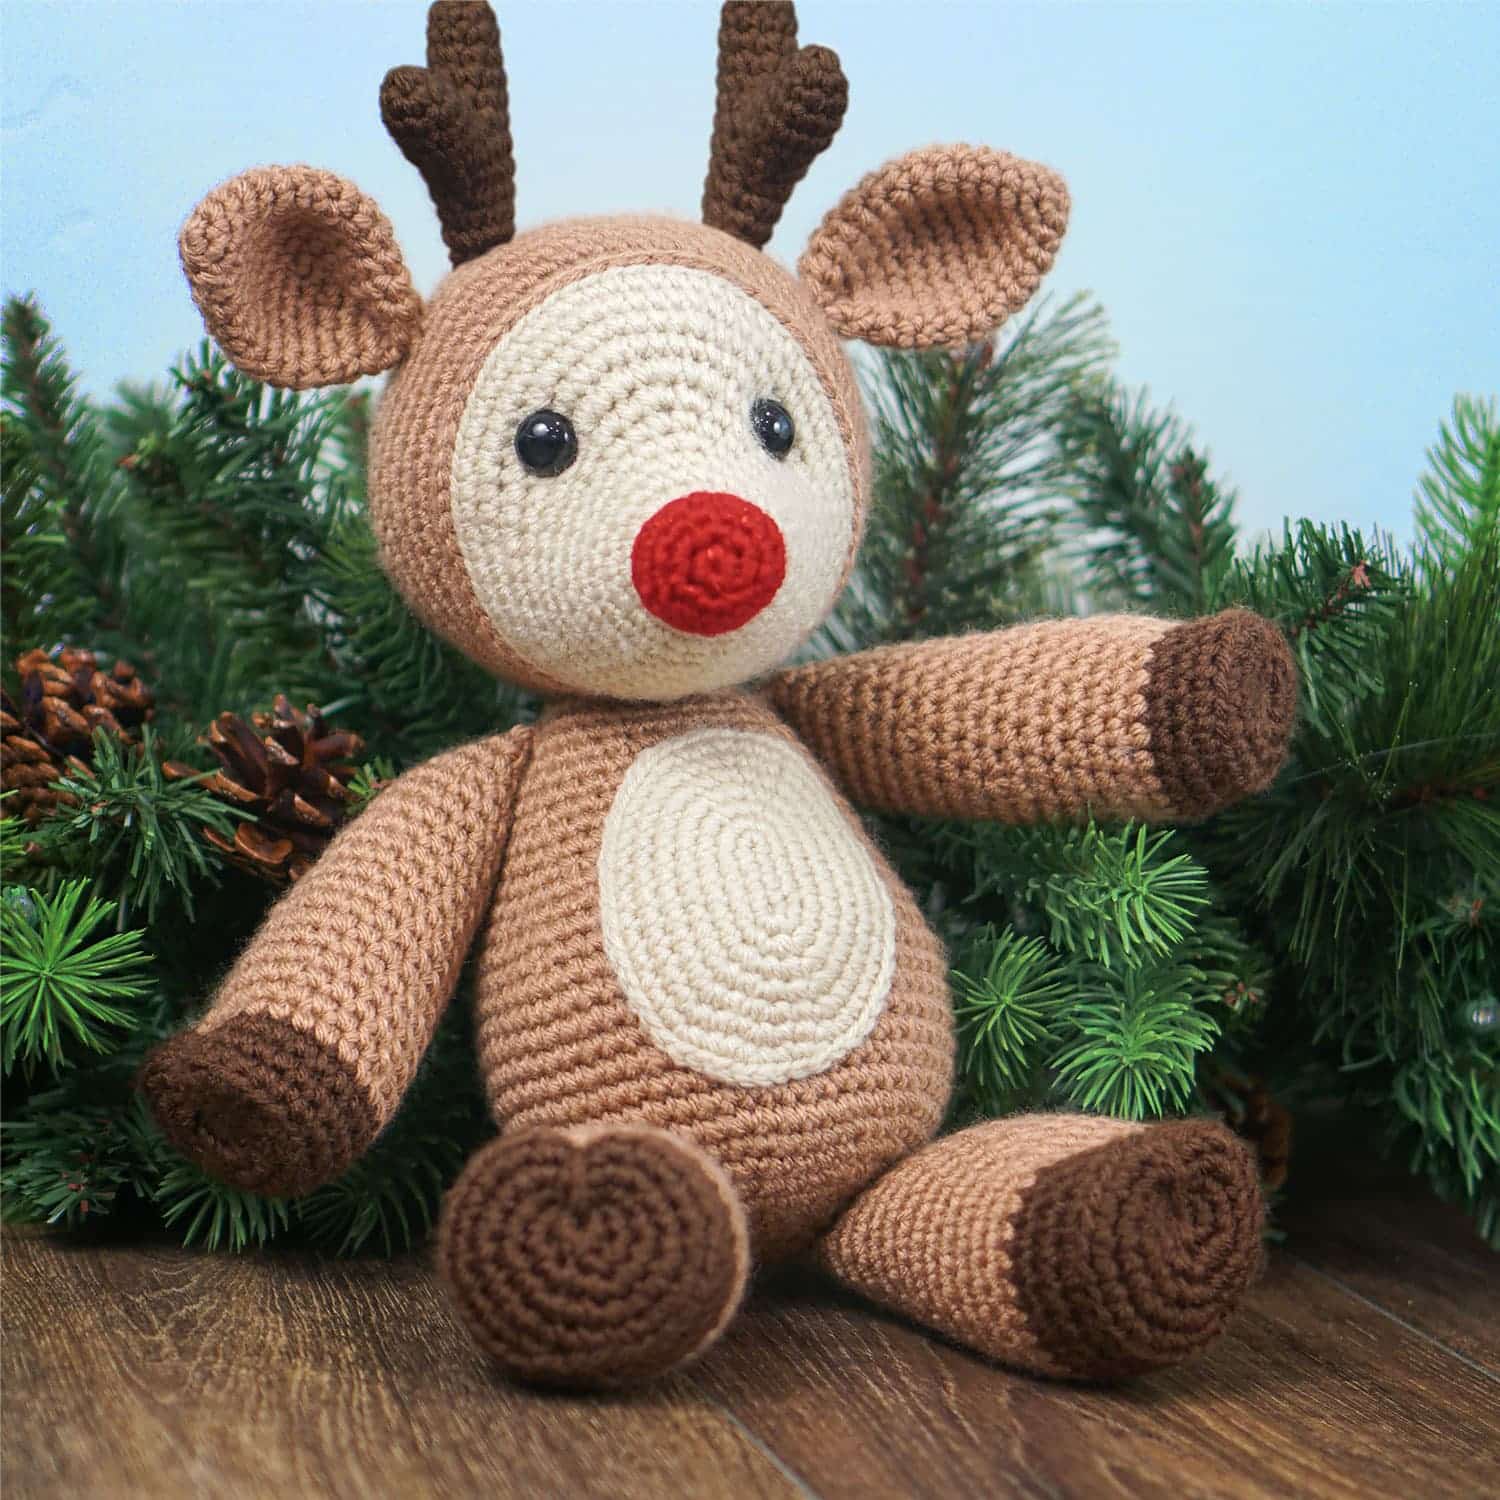


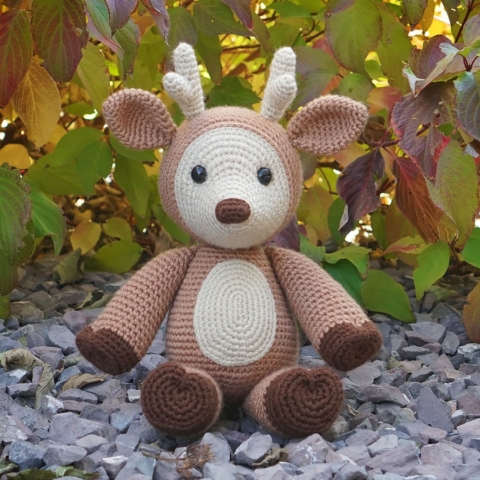
Dash the Deer
Skill level: Intermediate-Advanced
Ravelry: Dash the Deer
Supplies
Yarn (acrylic, weight 4) – 277 total yards
- Cream – 50 yards (I used Big Twist Value – Cream)
- Light Brown – 196 yards (I used I Love This Yarn! – Toasted Almond)
- Dark Brown – 31 yards (I used I Love This Yarn! – Brown)
Notes
- ch – chain
- slst – slip stitch
- sc – single crochet
- inc – complete two single crochets within the same stitch
- dec – combine two stitches into one with an invisible decrease
- BLO – crochet in the back loop only
- *sc x* – repeat the instructions between asterisks(*) the indicated number of times. If the pattern doesn’t tell you how many times to repeat, then repeat the sequence until you reach the end of the round.
General Instructions
- Work all stitches in both loops unless the pattern instructs otherwise.
- This pattern is worked in one continuous spiral. Do not join rounds unless the pattern indicates otherwise (in other words, do not slip stitch and chain to start a new round).
- Use a stitch marker to keep track of where one round ends and the next begins. I prefer to place my stitch marker in the last stitch of the round.
Recommended Sequence Here are the steps to create your deer, in order:
- Crochet the Nose & Head
- Crochet the Border on Face
- Crochet the Ears
- Crochet the Antlers
- Attach the Ears & Antlers to Head
- Crochet the Body
- Crochet the Arms
- Crochet the Legs
- Crochet the Belly
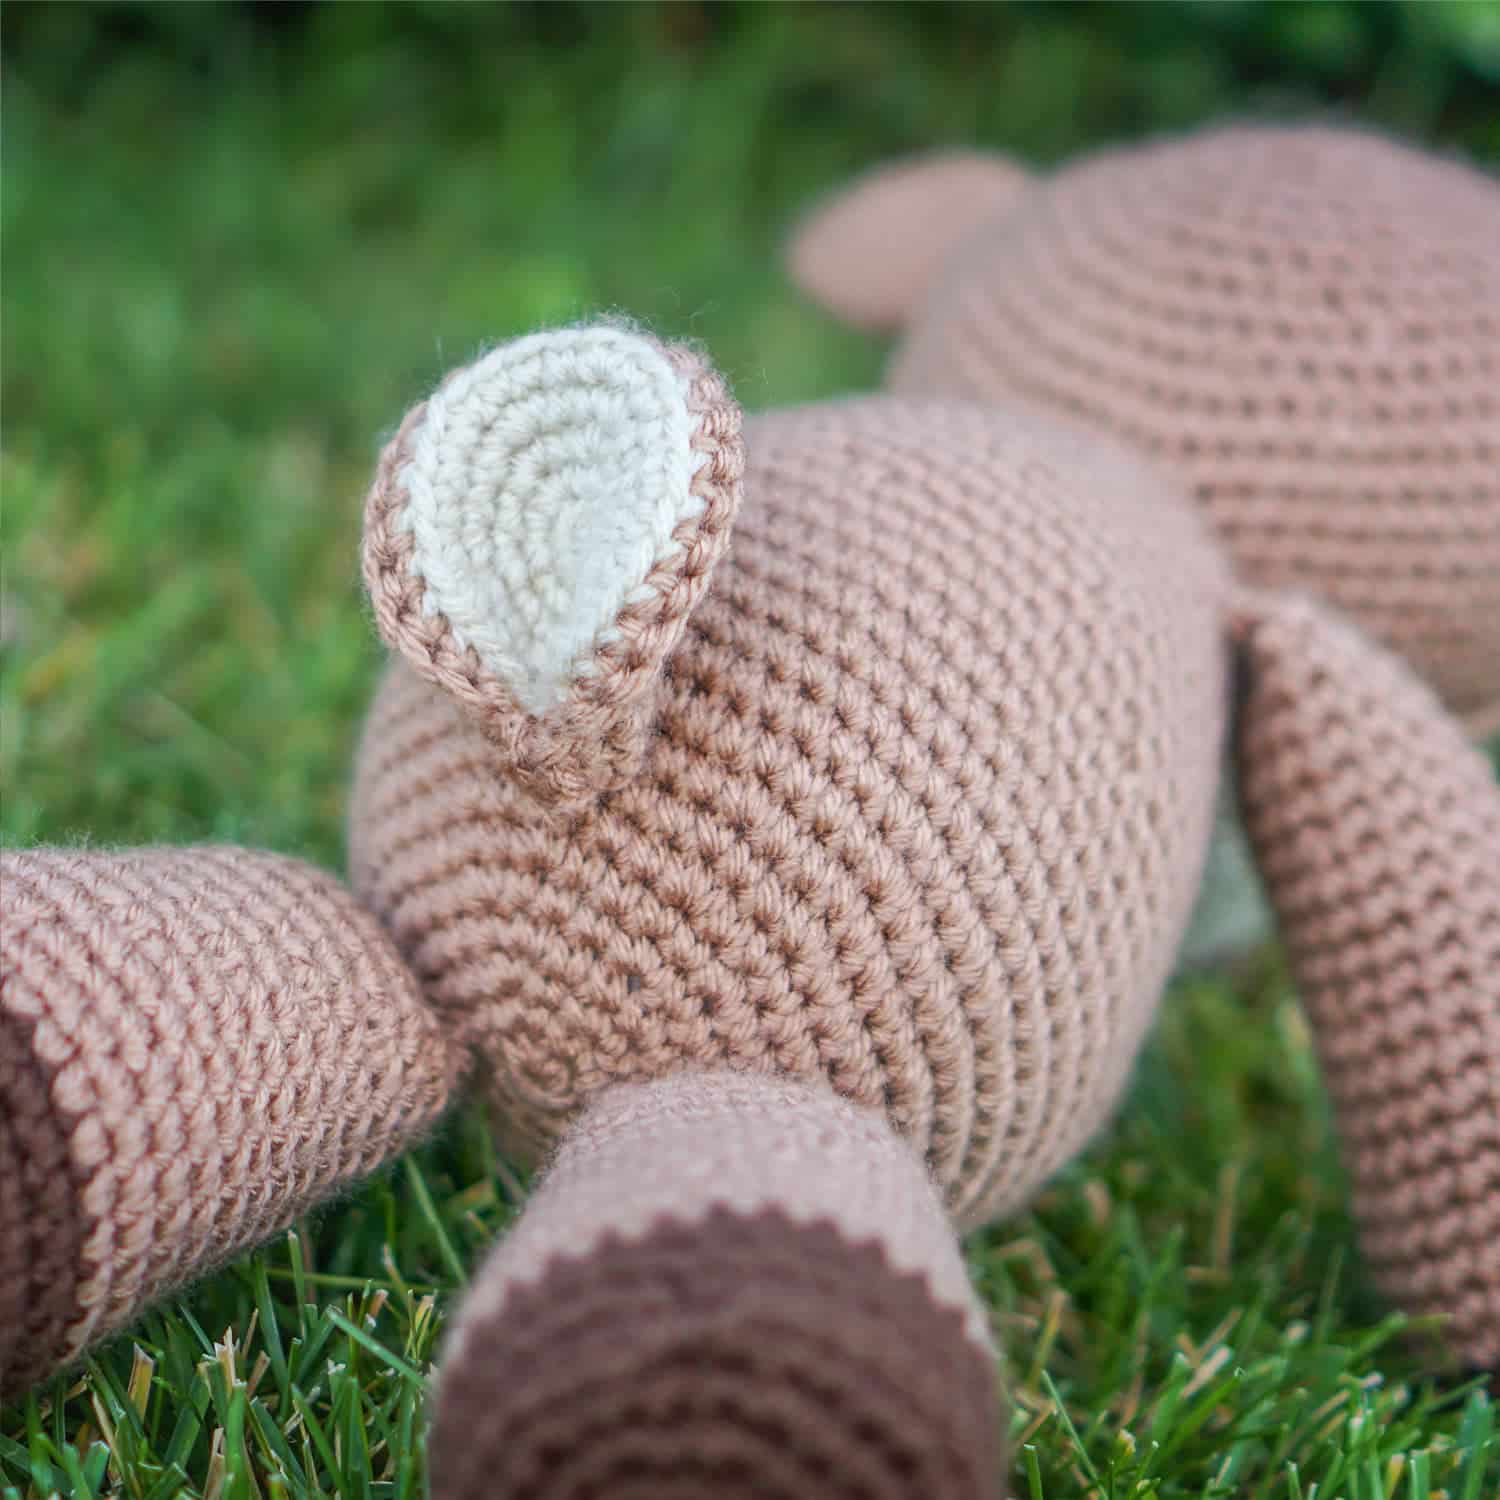
- Crochet the Tail
- Attach the Head to the Body
- Attach the Legs to the Body
- Attach the Arms to the Body
- Attach the Tail to the Body
- Attach the Belly to the Body
- Make the hooves appear cloven
Crochet Video Tutorials
- Chain 5 start
- Invisible finish
- Standing start
- Ultimate finish
- Magic ring
- Slip stitch closed
- How to join the antler branches
- How to make the tail
- How to make cloven hooves
Assembly Tutorials
- How to attach the head to the body
- How to attach the legs to the body
- How to attach the arms to the body
Size up hook on slip stitch BLO rounds
There are several rounds in this pattern that will instruct you to slip stitch around in the back loop only. Often in a later step, you’ll be crocheting into the exposed front loops created by slip stitching into the back loop.
Slip stitches often turn out tighter than regular single crochets and that can make them difficult to work into later on, so you may want to consider sizing up to a 4.0mm (G) hook for all slip-stitched BLO rounds.
Jogless BLO rounds & color changes
Be sure to check out my tutorial on how to create jogless BLO rounds. I also use this technique when changing colors before or after a BLO round.
The video explains how to “loop-under” and chain 1 before starting the round. If changing colors, simply complete the chain with the new color, and tighten the strands of both colors down before proceeding.
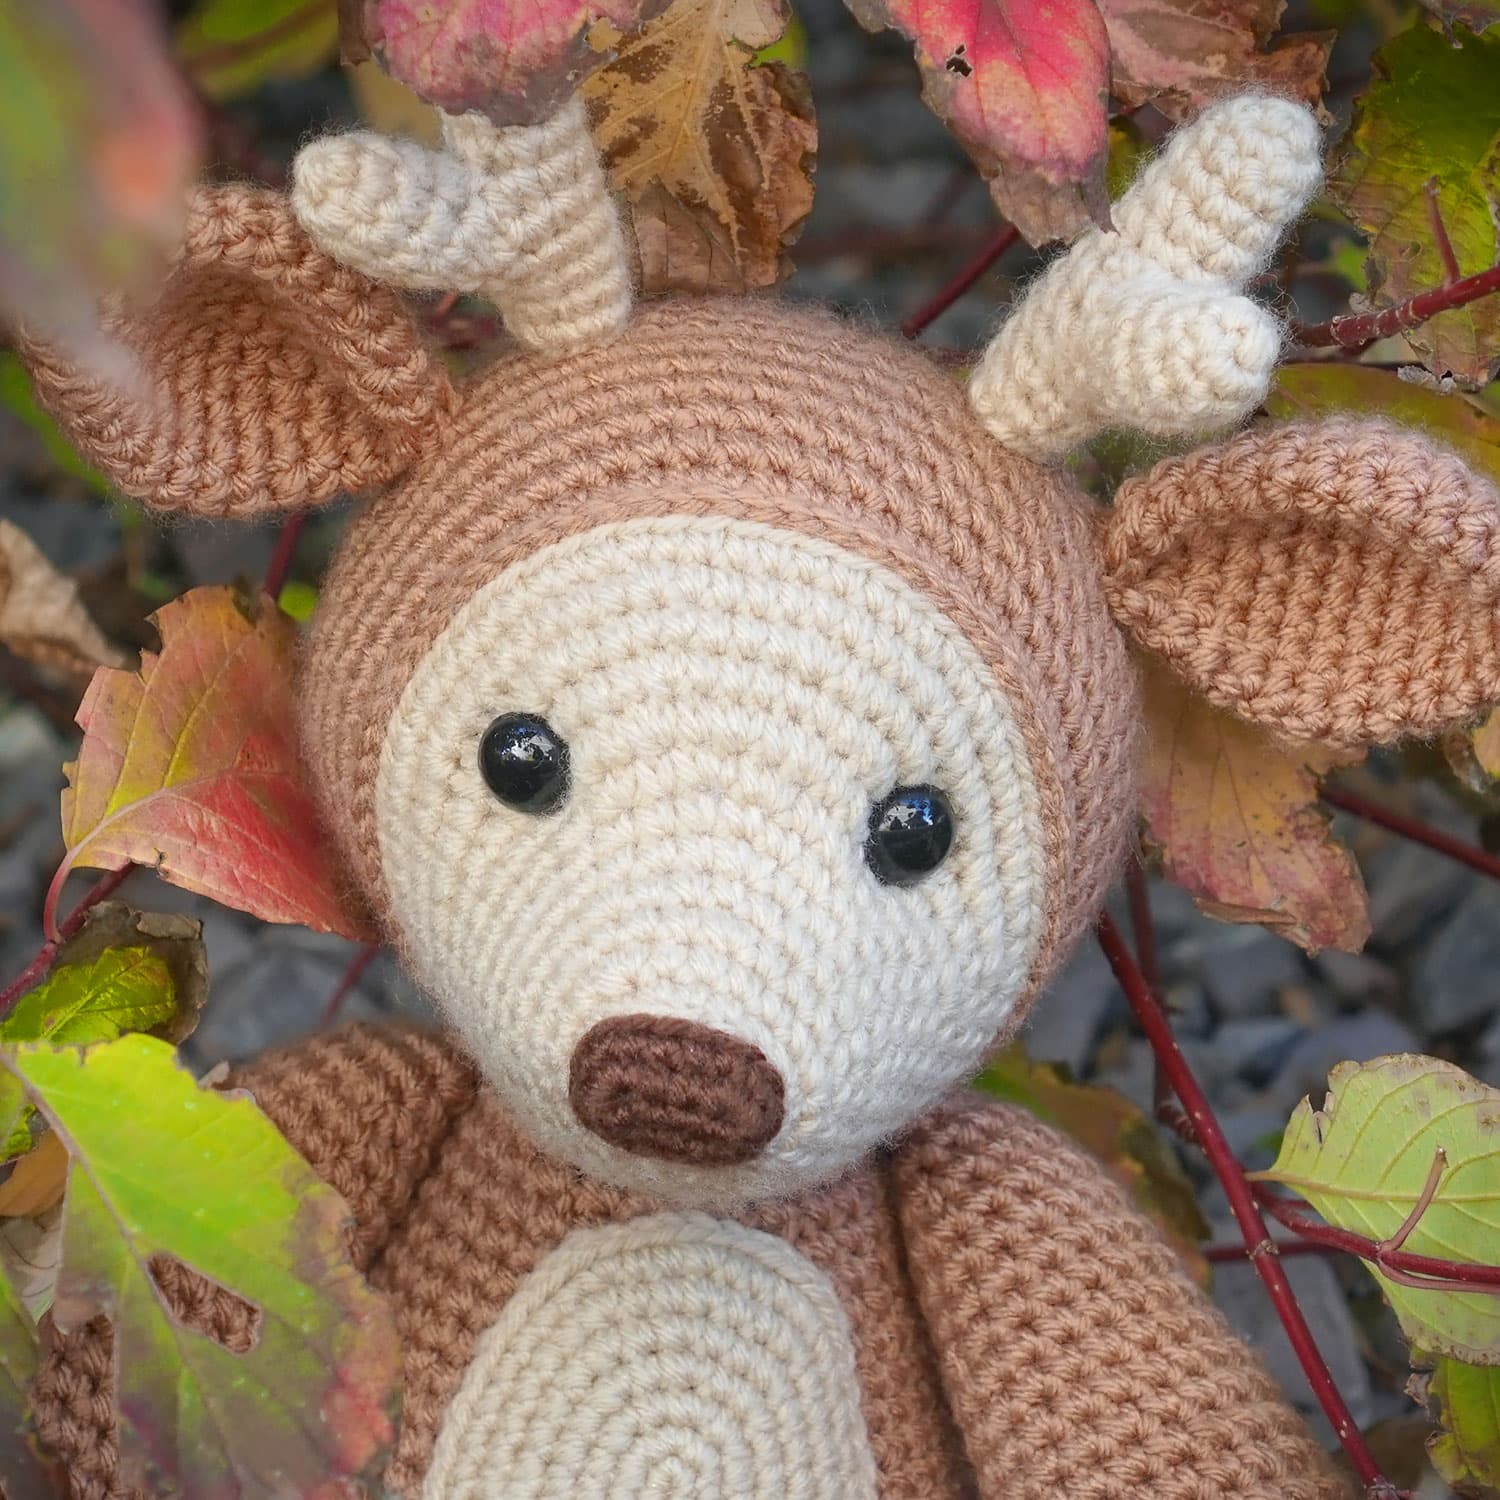
Stitch Markers for Antlers & Ears
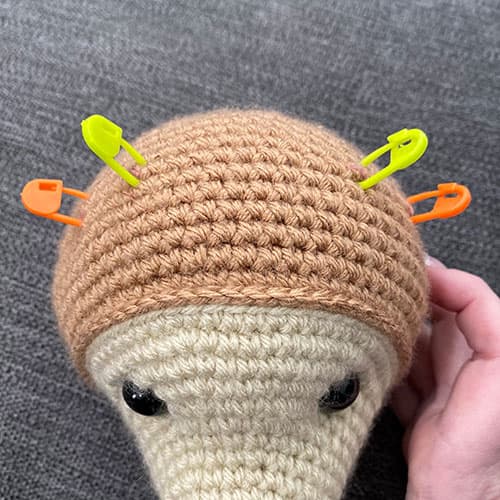
This photo shows what your head should look like after you’ve finished the Head, before sewing on the Antlers & Ears. The stitch markers should line up symmetrically above the eyes.
How to Indent the Eyes
Cut a strand of yarn approximately 18″ long. Tie a large, secure knot in one end and thread the other end through your yarn needle.
Insert your needle through the back opening of the head and sew between the two spots where you’ll be placing your safety eyes (marked with strands of yarn).
Pull your strand of yarn taut, which will create indents. Fasten off with a knot and hide your yarn tail inside the head.
Alternate Nose for Rudolph the Red-Nosed Reindeer
Nose
With red yarn:
01. start 6 sc into a magic ring [6]
02. inc in each st around [12]
03. *sc, inc* [18]
04. *sc 7, dec* [16]
05. sc 3, dec, sc 6, dec, sc 3 [14]
Fasten off and create an invisible finish. Secure with a knot inside the piece and trim the tail short.
The “false” stitch you just created from your invisible finish *will* be included in your stitch count for round 5. We’ll be working into this stitch to start round 1 of the Head.
Head
With cream yarn, create a slip knot on your hook.
01. BLO: slst in the back loop of the invisible finish on the nose, then slst in the back loop of each st around [14]
Proceed with the remaining rounds of the Head as written in the pattern.
Instructions
Nose
- With dark brown yarn:01. Chain 5 start: ch5, inc in 2nd ch from hook, sc 2, 5sc in the last ch. Continue on the other side of the chain base, sc 2, 3sc in the last ch [14]02. sc 8, sc and insert a new stitch marker into this stitch (the 9th stitch of the round), sc 5 [14]
Head
- With cream yarn, create a slip knot on your hook.
21. sc 20, sc and insert stitch marker Color 1 into this stitch (this is the 21st st from the beginning of the round), sc 3, sc and insert stitch marker Color 2 into this stitch (this is the 25th st from the beginning of the round), sc 9, sc and insert stitch marker Color 2 into this stitch (this is the 35th st from the beginning of the round), sc 3, sc and insert stitch marker Color 1 into this stitch (this is the 39th st from the beginning of the round), sc 21 [60]22 – 24. sc in each st around [60]25. sc 4, dec, *sc 8, dec* 5 times, sc 4 [54]26. *sc 7, dec* [48]27. sc 3, dec, *sc 6, dec* 5 times, sc 3 [42]28. *sc 5, dec* [36]29. sc 2, dec, *sc 4, dec* 5 times, sc 2 [30]
Border on Face
- With light brown yarn:01. starting in the first light brown front loop of round 15 on the Head (where your color join is), slst in each of the light brown front loops around [60]
Ears (make 2)
- With light brown yarn:01. start 6 sc into a magic ring [6]02. *sc, inc* [9]03. sc, inc, *sc 2, inc* 2 times, sc [12]04. *sc 3, inc* [15]05. sc 2, inc, *sc 4, inc* 2 times, sc 2 [18]06. *sc 5, inc* [21]07. sc 3, inc, *sc 6, inc* 2 times, sc 3 [24]08 – 09. sc in each st around [24]10. sc 3, dec, *sc 6, dec* 2 times, sc 3 [21]11. *sc 5, dec* [18]12. sc 2, dec, *sc 4, dec* 2 times, sc 2 [15]13. *sc 3, dec* [12]14. sc in each st around [12]
Antlers – Short Branch (make 2)
- With cream yarn:01. start 4 sc into a magic ring [4]02. inc in each st around [8]03 – 04. sc in each st around [8]
Antlers – Long Branch (make 2)
- With cream yarn:01. start 4 sc into a magic ring [4]02. inc in each st around [8]03 – 07. sc in each st around [8]
Attach Ears & Antlers to Head
- At this point you should have 4 marked stitches in 2 different colors on the head. The outer markers (Color 1) are where you should place the ears. The inner markers (Color 2) are where you should place the antlers. See "Stitch Markers for Antlers & Ears" in the Notes section for more details.
Body
- With light brown yarn:01. start 6 sc into a magic ring [6]02. inc in each st around [12]03. *sc, inc* [18]04. sc, inc, *sc 2, inc* 5 times, sc [24]05. *sc 3, inc* [30]06. sc 2, inc, *sc 4, inc* 5 times, sc 2 [36]07. *sc 5, inc* [42]08. sc 3, inc, *sc 6, inc* 5 times, sc 3 [48]09. *sc 7, inc* [54]10. sc 4, inc, *sc 8, inc* 5 times, sc 4 [60]11 – 17. sc in each st around [60]18. sc 4, dec, *sc 8, dec* 5 times, sc 4 [54]19. sc in each st around [54]20. *sc 7, dec* [48]21. sc in each st around [48]22. sc 3, dec, *sc 6, dec* 5 times, sc 3 [42]23 – 24. sc in each st around [42]25. *sc 5, dec* [36]26 – 27. sc in each st around [36]28. sc 2, dec, *sc 4, dec* 5 times, sc 2 [30]29 – 30. sc in each st around [30]31. *sc 3, dec* [24]
Arms (make 2)
- With dark brown yarn: 01. start 6 sc into a magic ring [6]02. inc in each st around [12]03. *sc, inc* [18]04. sc, inc, *sc 2, inc* 5 times, sc [24]05. BLO: sc in each st around [24]06 – 07. sc in each st around [24]
Legs (make 2)
- With dark brown yarn:01. start 6 sc into a magic ring [6]02. inc in each st around [12]03. *sc, inc* [18]04. sc, inc, *sc 2, inc* 5 times, sc [24]05. *sc 3, inc* [30]06. BLO: sc in each st around [30]07 – 08. sc in each st around [30]
Belly
- With cream yarn:01. Chain 5 start: ch5, inc in 2nd ch from hook, sc 2, 5sc in the last ch. Continue on the other side of the chain base, sc 2, 3sc in the last ch [14]02. inc, sc 4, *inc* 3 times, sc 4, *inc* 2 times [20]03. inc, sc 6, *inc* 2 times, sc, inc, sc 6, *inc* 2 times, sc [26]04. inc, sc 8, *inc, sc* 2 times, inc, sc 8, *inc, sc* 2 times [32]05. inc, sc 10, inc, sc 2, inc, sc, inc, sc 10, inc, sc 2, inc, sc [38]06. inc, sc 12, *inc, sc 2* 2 times, inc, sc 12, *inc, sc 2* 2 times [44]07. inc, sc 14, inc, sc 3, inc, sc 2, inc, sc 14, inc, sc 3, inc, sc 2 [50]
Tail – Bottom Side
- With cream yarn:01. start 6 sc into a magic ring [6]02. inc in each st around [12]03. *sc, inc* [18]04. sc, inc, *sc 2, inc* 5 times, sc [24]05. *sc 3, inc* [30]
Tail – Top Side
- With light brown yarn:01. start 6 sc into a magic ring [6]02. inc in each st around [12]03. *sc, inc* [18]04. sc, inc, *sc 2, inc* 5 times, sc [24]05. *sc 3, inc* [30]
Finishing the Tail
- The tail is made by crocheting a cream-colored circle and a light brown-colored circle. Next, put the wrong sides together and attach them by single crocheting around (see my Deer Tail video tutorial).